Create Custom Fields
Mass creating fields in Salesforce is an extremely slow and painful process. Use Jetstream to quickly create fields on one or more objects at the same time! 🎉
Selecting objects, profiles and permission sets
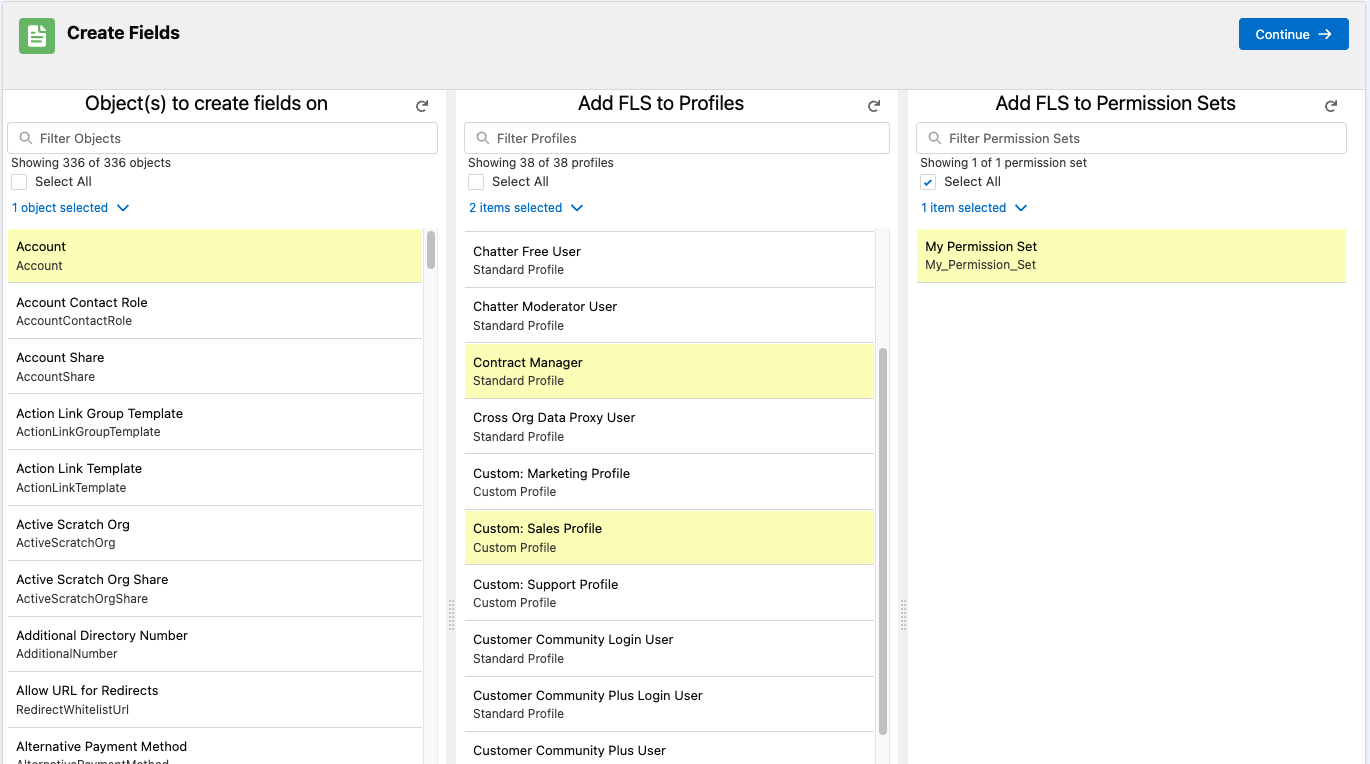
The first step will be to choose which object(s) you want to create fields on which Profiles and Permission Sets you want to set Field Level Security (FLS) on.
Normally you will only need to include one object, but sometimes you may want to create the same fields on multiple objects.
After choosing at least one Object, click Continue to go to the configuration page.

Configuring fields
Complete the form for the field that you would like to create. If you change the Type of the field, the form and required input will adjust accordingly.
Once your field is fully configured, you will see a check mark indicating the field is configured correctly.
To add additional fields, click the + New Field or the + Clone button.

If you need to make changes to the selected objects, profiles, or permission sets - you can go back to the prior page without losing your work!
Importing or exporting fields
Jetstream allows you to import and export your fields to save your work and allow you to work in your spreadsheet tool of choice.
Export
To export your configured fields, click the Export Fields button.
From here you can save the file for future use or you can open it in your favorite spreadsheet tool to make changes to the data and import your changes.
To export an example template, click the dropdown and choose Export Example Template.
Import
To import fields, click the Import Fields button and upload your excel or csv template.
This will add all the fields from your spreadsheet to the page.
ℹ️ If you have configured fields on the page,
you may want to click Reset Fields before importing as existing fields on the page will not be updated.
Download the example template as a starting point to see an example of what fields are required for each field type.

Deploying fields
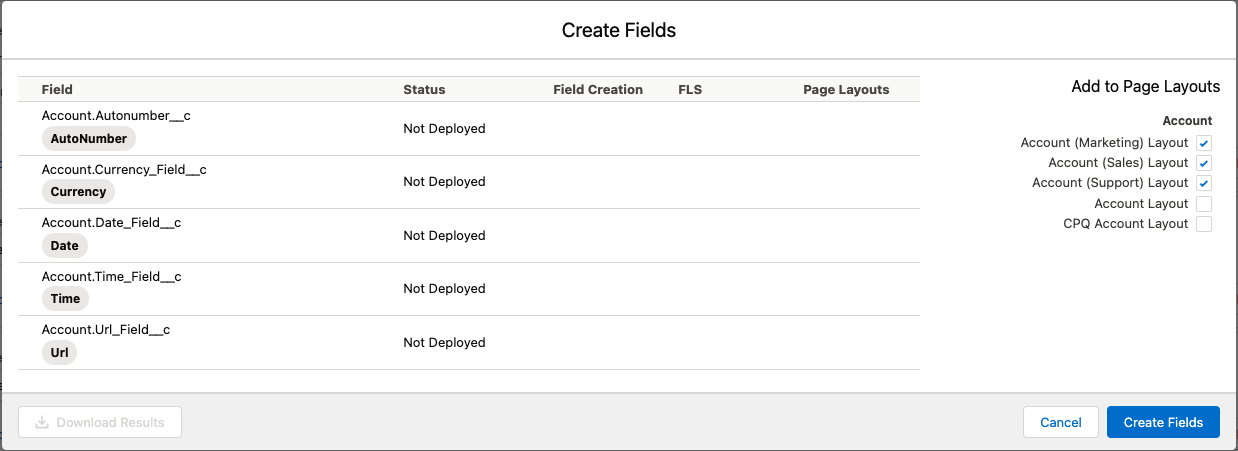
When you are ready to deploy your fields, click the Create Fields button to open a modal which guides you through the rest of the process.
Each field will be listed once per object, if you have selected more than one object, you will see each field listed more than once.
A list of page layouts will be displayed on the page for each of your selected objects. If you want to add your fields to layouts, click the checkbox next to each layout you which to add the fields to.
Click Create Fields when you are ready to deploy the fields to your org along with FLS, and page layouts updates.

Results
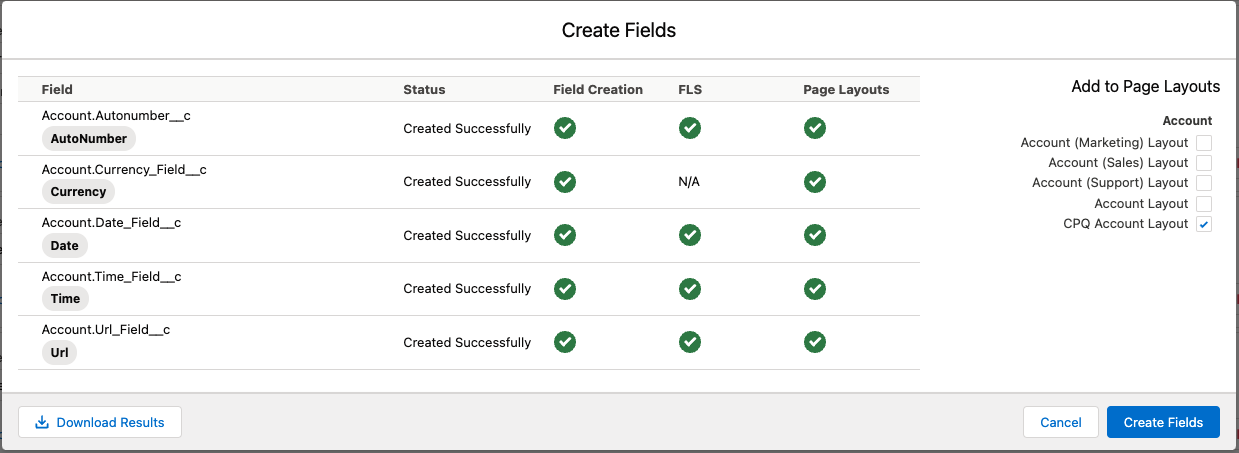
After your fields are deployed, you will see as summary of each field that was deployed with a success, partial success, N/A, or error icon.
Hover your mouse over the warning or error icon to see a tooltip of the errors.
If you click Create Fields a second time while the modal is open, Jetstream will perform an update to the existing fields.
After you deploy your fields, click Download Results to save the results to your computer.
In addition to the deploy results, the file also includes a template of your fields that you can import into Jetstream again in the future.

Deploy Errors
If the field could not be deployed, you will see an error message listed for each field.
If the deployment was successful, but an error occurred with FLS or Page Layouts, then you will see a warning or error icon indicating that one or more items has failed.
Due to a Salesforce bug, some standard object layouts may fail to deploy.
Example of errors


