Single Sign-On - Okta
Before configuring Okta as an identity provider for your Jetstream team, ensure that you have verified your organization's domain ownership.
You can set up Single Sign-On (SSO) for your Jetstream team using Okta as an OpenID Connect (OIDC) provider or as a SAML provider.
Configure Okta Workspace for OIDC SSO
Add SSO provider in Jetstream
Choose "Add SSO Provider" from your Team Dashboard and select "OIDC" as the provider.
Create an Application in Okta
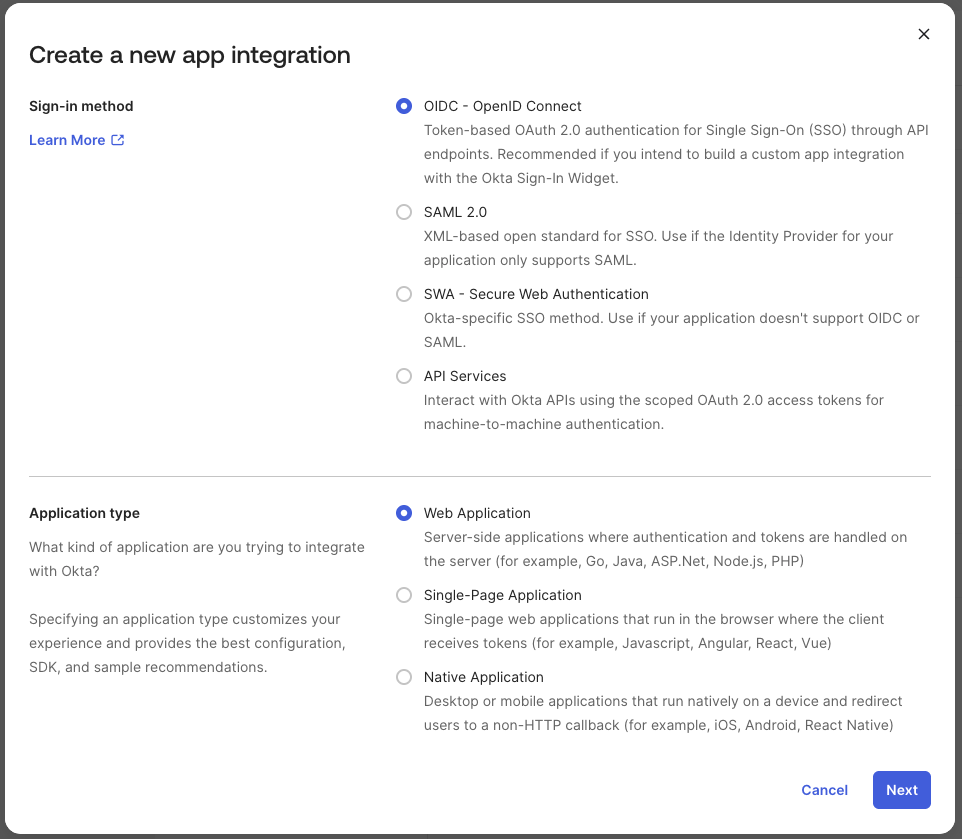
Go to your Okta admin dashboard and navigate to Applications in the top menu, then click Create App Integration.
Choose OIDC - OpenID Connect as the Sign-in method, ensure Web Application is selected, and click Next.
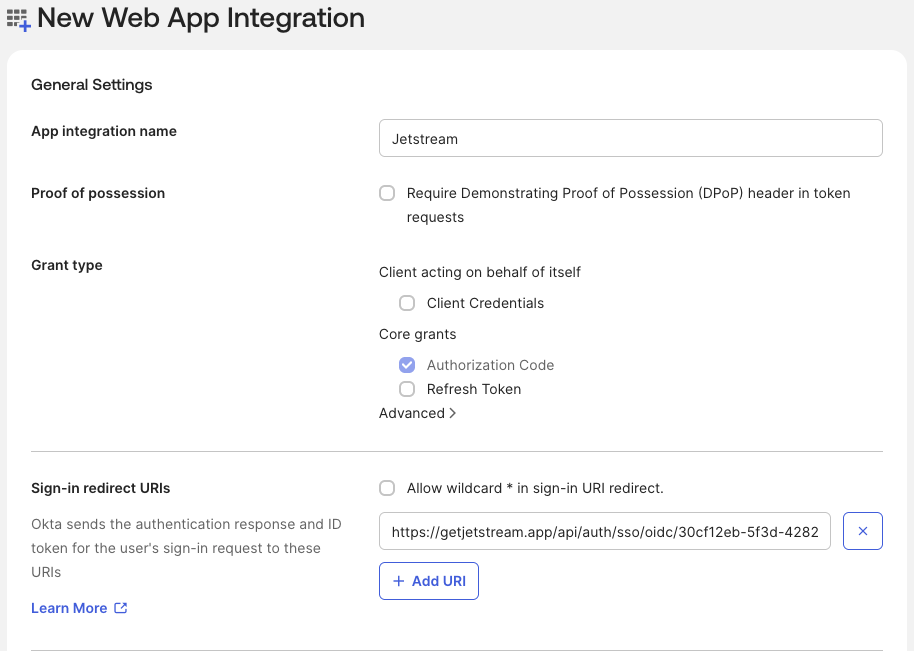
Enter an Application Name and copy and paste in the Redirect URI from the Team Dashboard in Jetstream. It will be in the format:
https://getjetstream.app/api/auth/sso/oidc/{uuid}/callback
Optionally choose to assign the app to specific groups or users in your Okta directory.
Click Save to create the application.
Take note of the Client ID and Client Secret generated for your new application as you will need these to configure the connection in Jetstream.
It is recommended that you enable the Require PKCE as additional verification option for enhanced security, regardless of your choice Jetstream will always use PKCE when connecting to Okta.
Configure Jetstream Connection
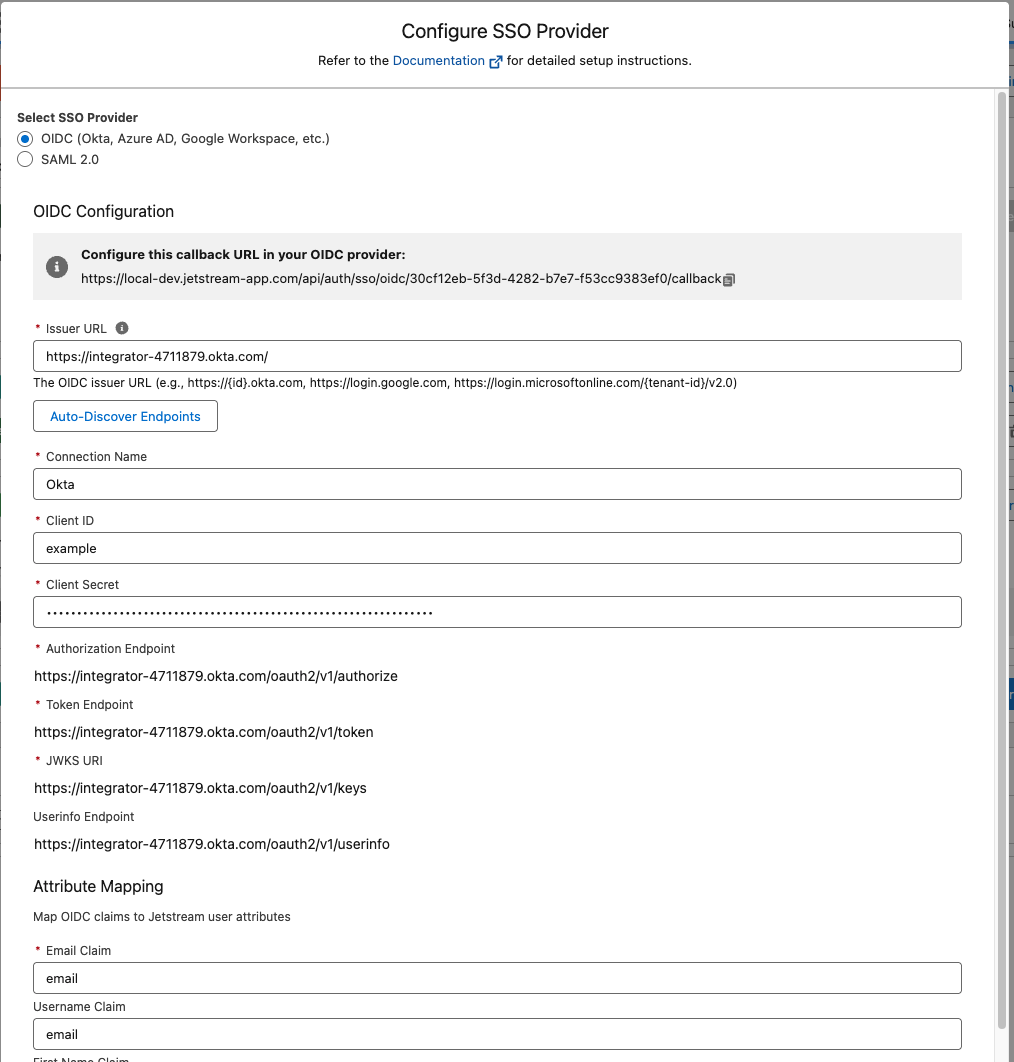
Enter the Issuer URL in the format https://{yourOktaDomain}.okta.com. Jetstream discovers the authorization, token, and JWKS endpoints from your issuer automatically when you save.
Look at the URL in your admin dashboard for the format, but remove the -admin from the domain.
For example, if your Okta admin dashboard URL is https://dev-123456-admin.okta.com, your Issuer URL will be https://dev-123456.okta.com.
Copy the Client ID and Client Secret from the Okta application you just created into the corresponding fields in the Team Dashboard when adding the SSO provider.
Click "Save" to finish configuring the connection.
Enable the connection
After saving the connection, make sure to check the "Enable SSO" checkbox to enable SSO for your team.
You can optionally allow users with specific roles to bypass SSO, by default this is enabled for administrators.
Enable IdP-Initiated Login (Optional)
To allow users to launch Jetstream directly from the Okta dashboard by clicking the Jetstream app tile, configure the Initiate Login URI in Okta.
- In Okta, go to your Jetstream application and navigate to General Settings.
- Under Login, find the Initiate login URI field.
- Copy the Initiate Login URI shown in the Jetstream Team Dashboard SSO configuration and paste it into the Okta field. It will be in the format:
https://getjetstream.app/api/auth/sso/oidc/{uuid}/initiate
- Save the changes.
Now users can click the Jetstream tile in their Okta dashboard and be automatically logged in.
Configure Okta Workspace for SAML SSO
Add SSO provider in Jetstream
Choose "Add SSO Provider" from your Team Dashboard and select "SAML" as the provider.
Create an Application in Okta
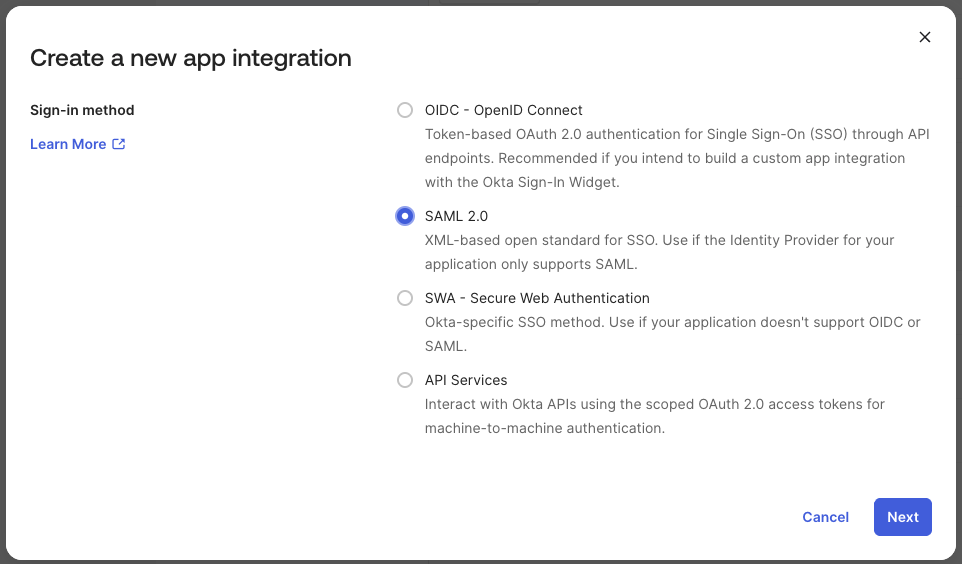
Go to your Okta admin dashboard and navigate to Applications in the top menu, then click Create App Integration.
Choose SAML 2.0 as the Sign-in method, and click Next.
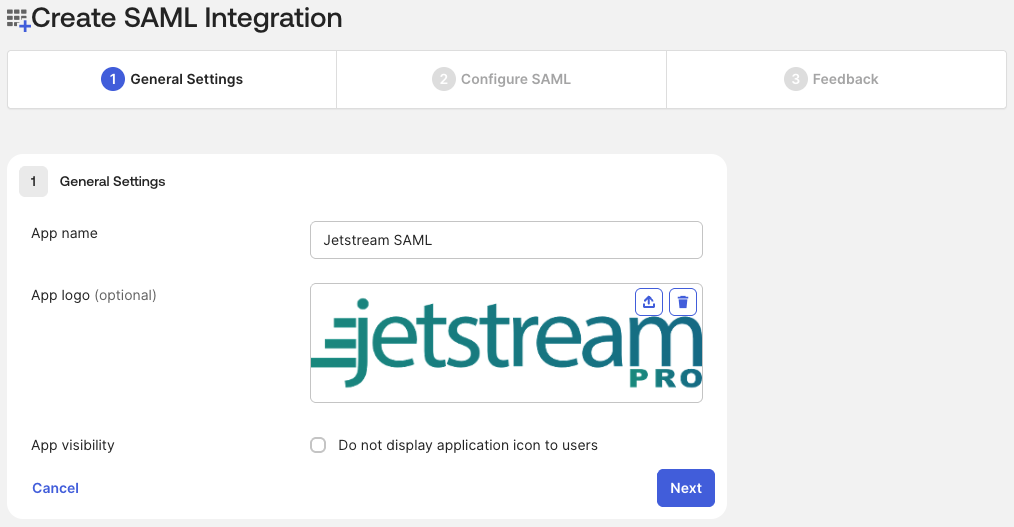
Enter an Application Name
Upload an optional app icon - here are some options:
- https://getjetstream.app/assets/images/jetstream-logo-1200w.png
- https://getjetstream.app/assets/images/jetstream-logo-pro-1200w.png
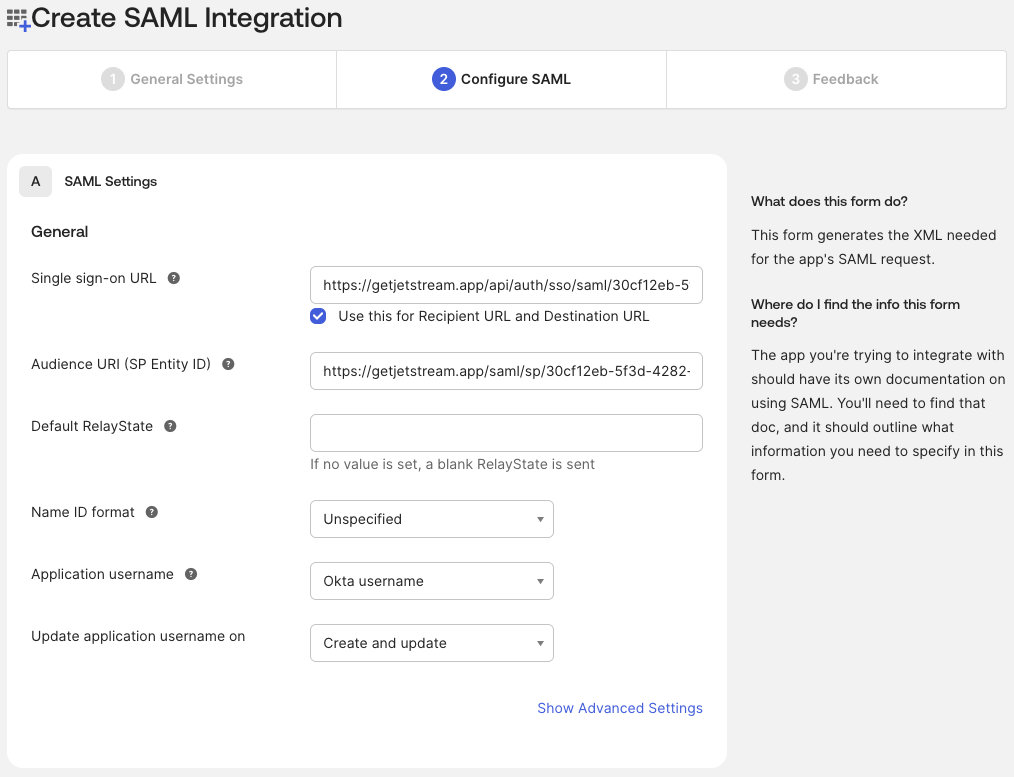
Configure SAML Settings
In the SAML Settings, you will need to enter the ACS URL and Entity ID from the SAML configuration modal within Jetstream into the corresponding fields in the Okta form.
Click Next and then Finish to create the application.
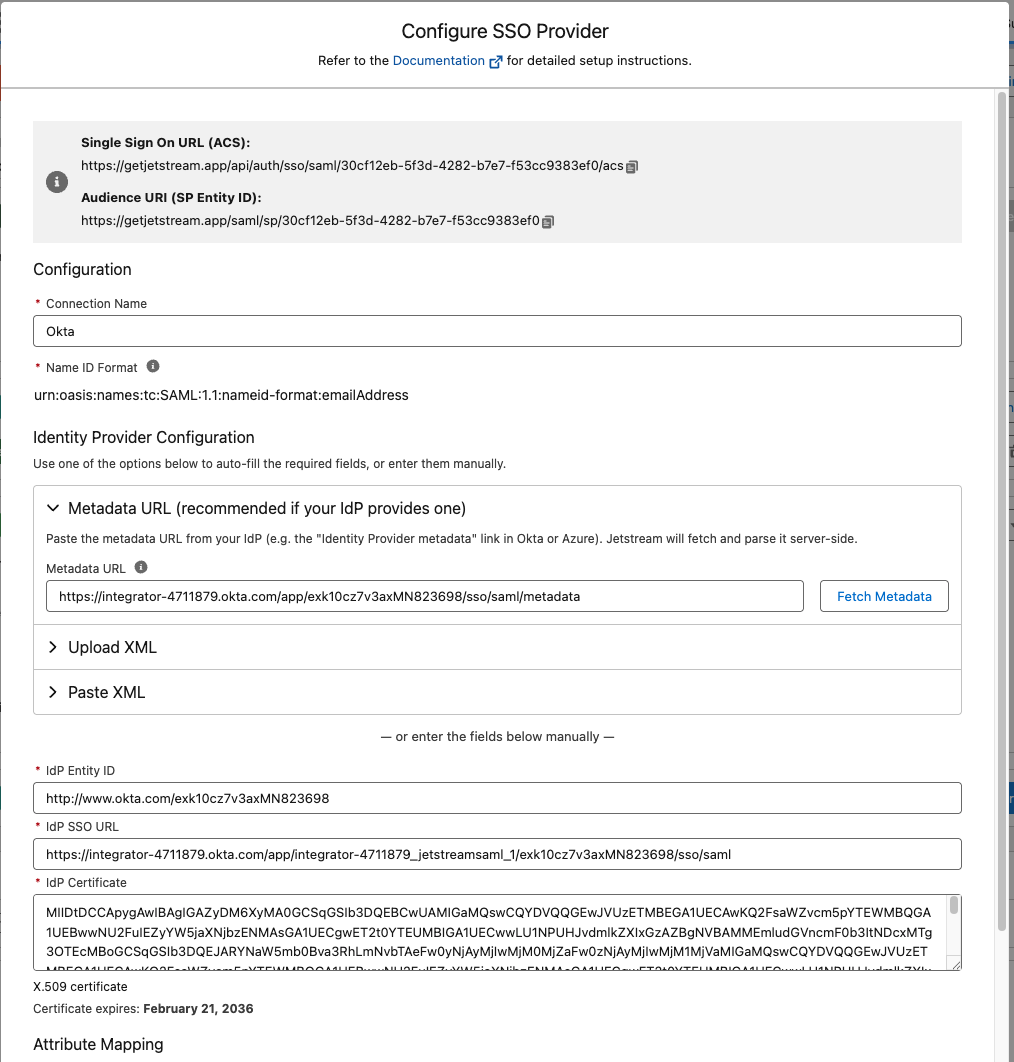
Configure Jetstream Connection
Copy the Metadata URL from Okta and paste it into Jetstream in the Metadata URL field, then click "Fetch Metadata". This will automatically populate the IdP SSO URL and IdP Certificate fields.
Alternatively, you can visit the URL in your browser and copy the contents of the XML file and paste it into the IdP Metadata XML field in Jetstream.
Enable the connection
After saving the connection, make sure to check the "Enable SSO" checkbox to enable SSO for your team.
You can optionally allow users with specific roles to bypass SSO, by default this is enabled for administrators.