Single Sign-On - Google
Before configuring Google as an identity provider for your Jetstream team, ensure that you have verified your organization's domain ownership.
You can set up Single Sign-On (SSO) for your Jetstream team using Google as an OpenID Connect (OIDC) provider or as a SAML provider.
Configure Google Workspace for OIDC SSO
Add SSO provider in Jetstream
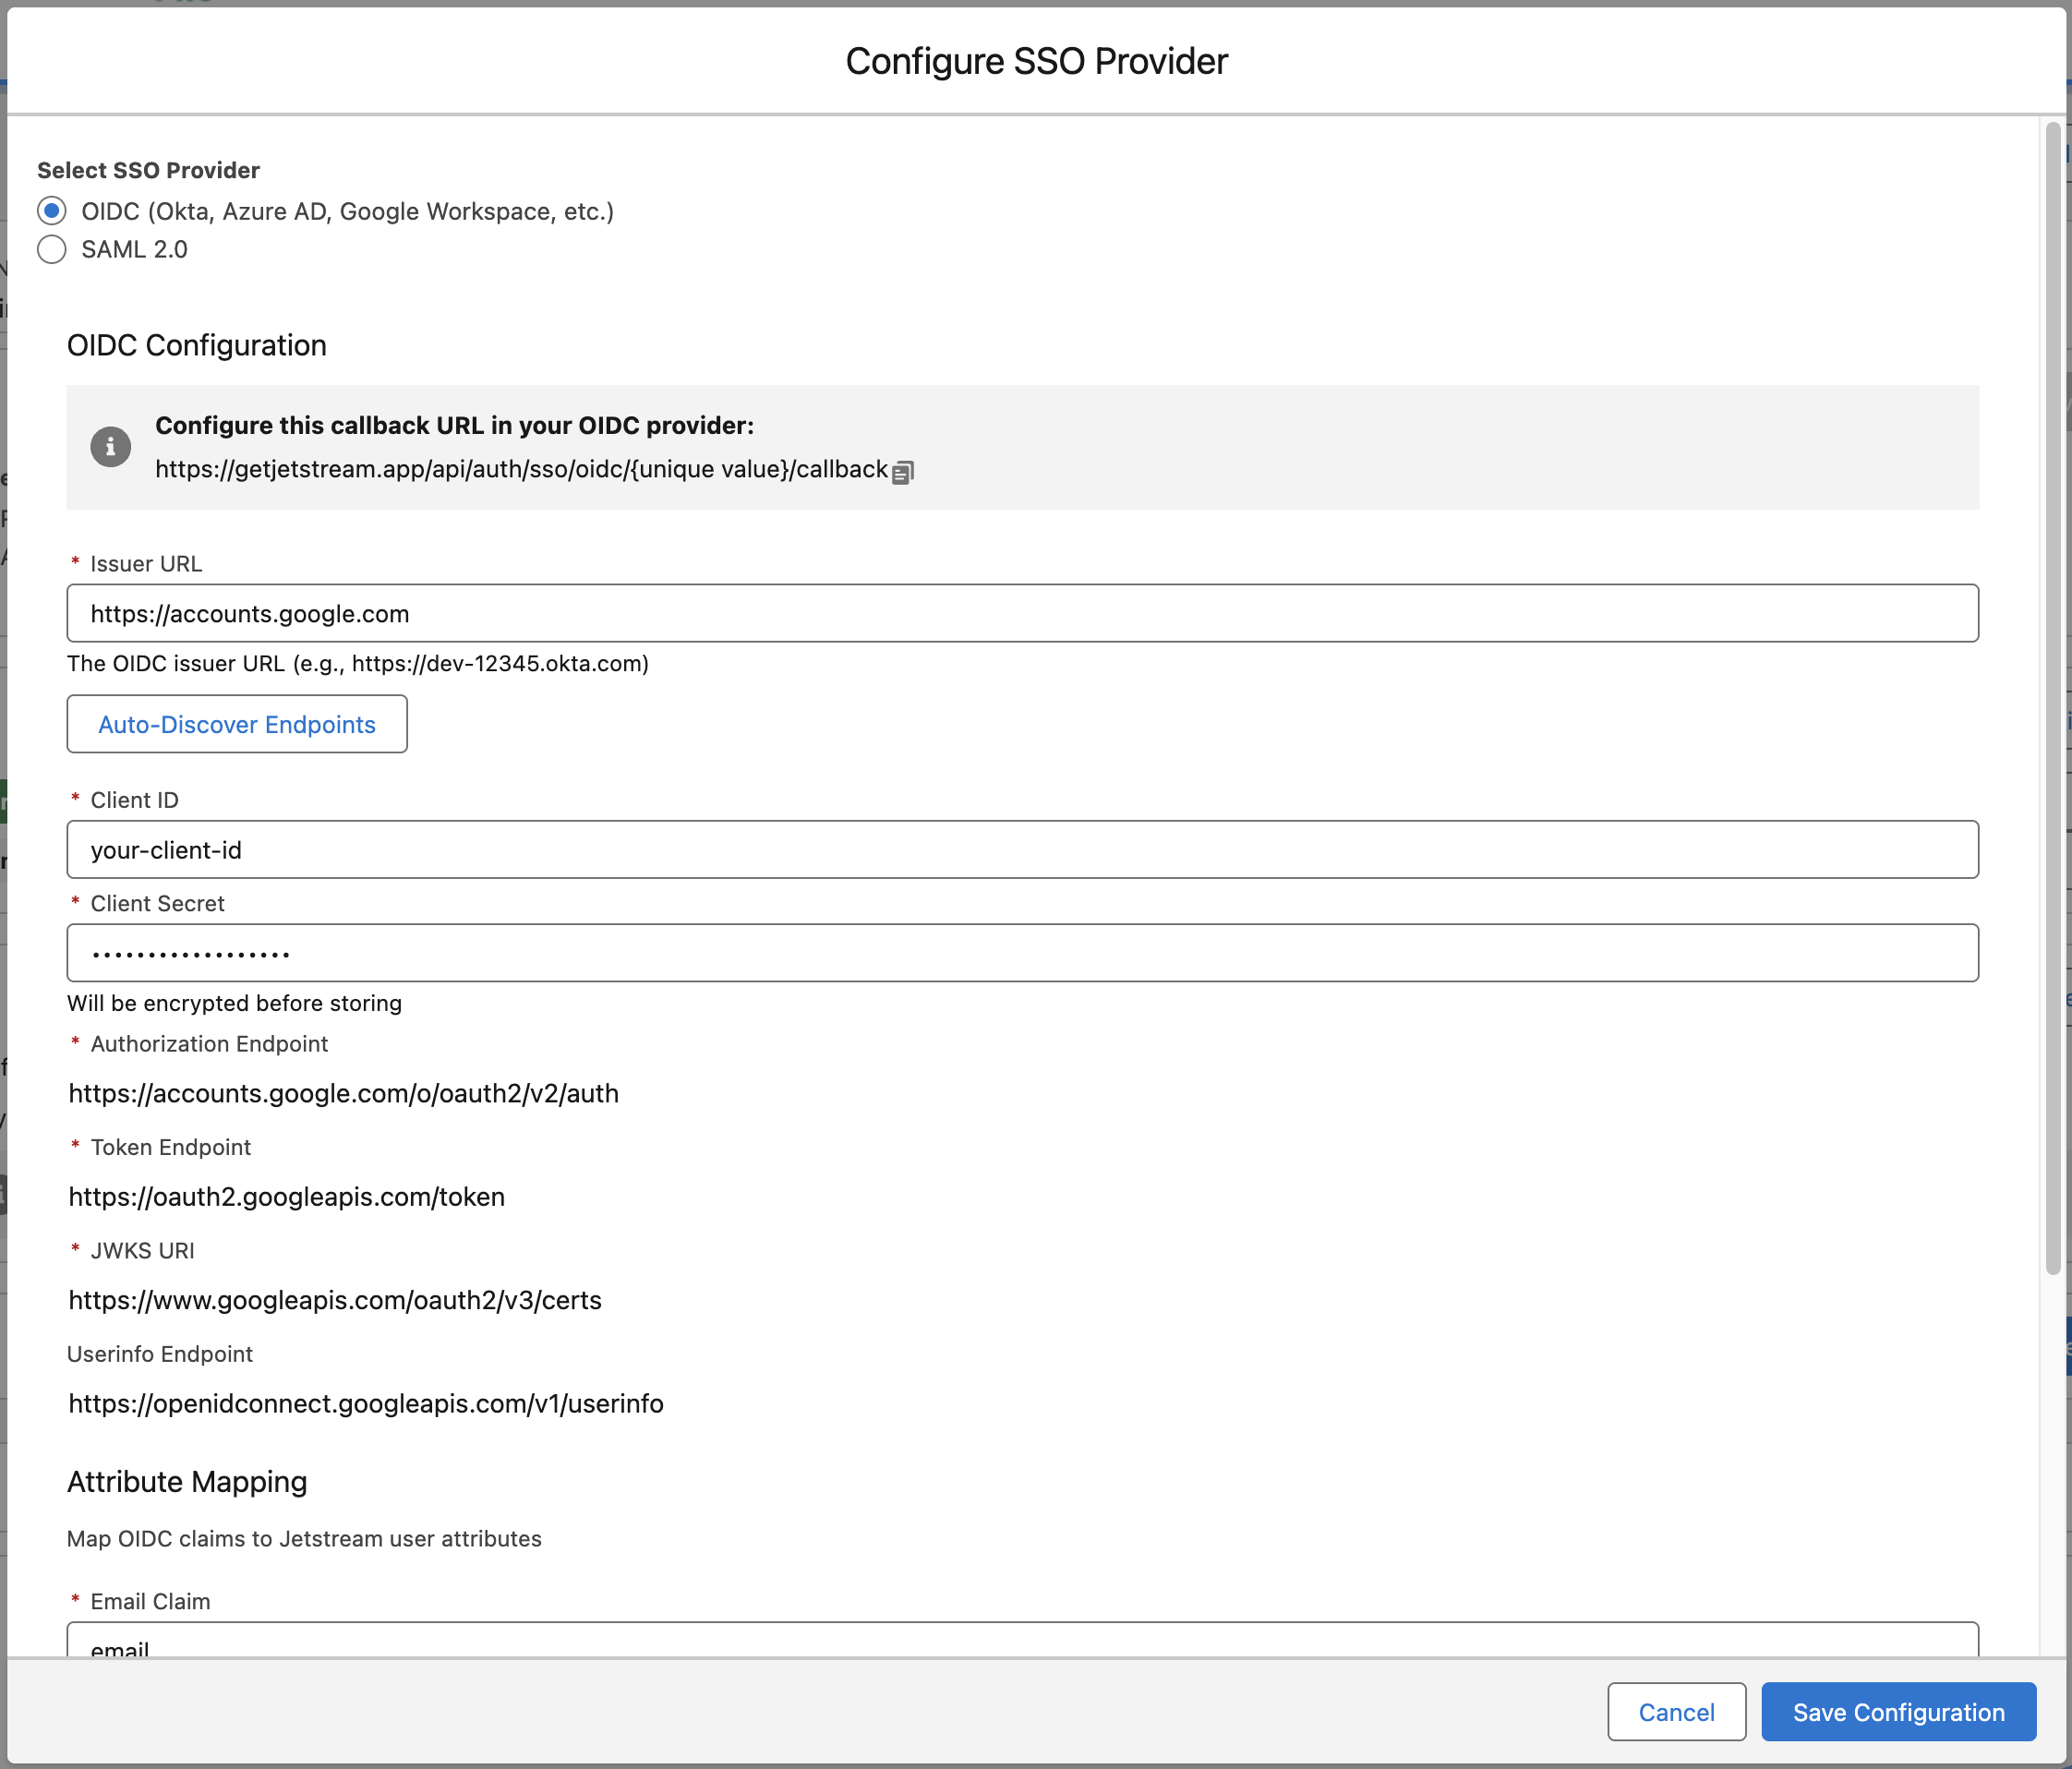
Choose "Add SSO Provider" from your Team Dashboard and select "OIDC" as the provider.
Enter https://accounts.google.com as the Issuer URL. Jetstream discovers the authorization, token, and JWKS endpoints from your issuer automatically when you save.
Create an Application
To connect your Google tenant as an identity provider, you must create an OIDC application.
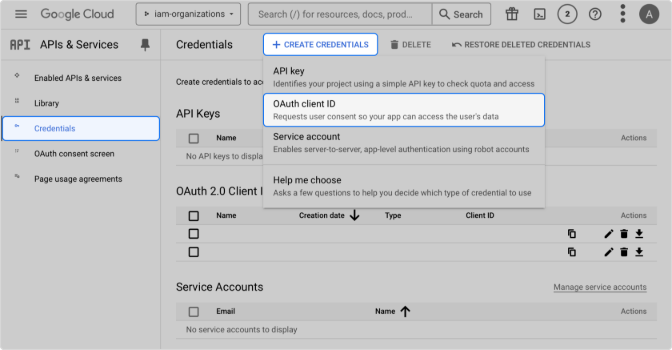
Go to the Google Developer Console and choose the project to add your new application to or create a new project.
Select APIs & Services from the dashboard, then Credentials in the left-hand navigation.
Click Create Credentials and select OAuth client ID.
Choose Web application as your Application type.
Enter a Name for the application and add the Authorized Javascript Origins and Authorized Redirect URIs below.
Authorized Javascript Origins:
https://getjetstream.app
Authorized Redirect URIs:
You will need to replace {uuid} with your Jetstream team's unique identifier obtained from the Team Dashboard when adding the SSO provider.
https://getjetstream.app/api/auth/sso/oidc/{uuid}/callback
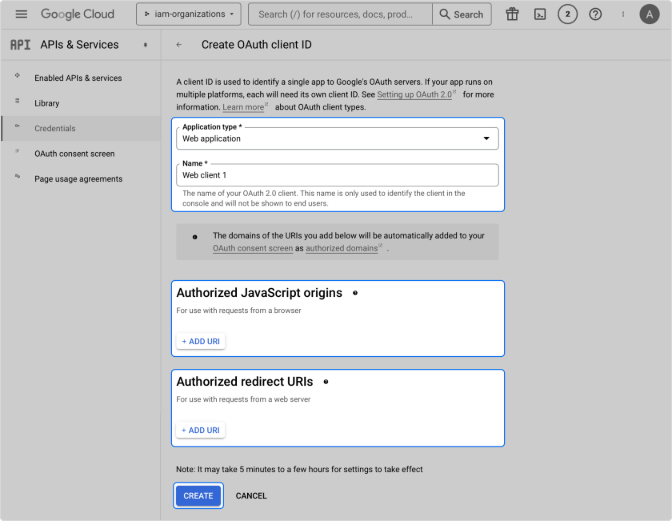
Select Create.
Make sure to copy your Client ID and Client Secret as you will use them in the next step to configure your Google connection.
Configure Connection
Enter the Client ID and Client Secret obtained from the Google Developer Console into the corresponding fields in the Team Dashboard when adding the SSO provider.
If needed, you can adjust the attribute mappings to match your organization's user attributes, but this is typically not necessary for Google.
Assign Access (Optional)
If you want to restrict access to Jetstream to specific organizational units or groups within your Google workspace, you can assign access to the application you created.
Depending on your organization's policies, this step may be required to allow users to authenticate using Google SSO.
Assign users or groups in your organization to Jetstream to allow them to authenticate using Google SSO.
Go to the Google Admin Console and select Directory > Organizational units in the left-hand navigation.
If applicable, select Create organizational unit to create a unit under your primary unit.
Go to Directory > Users and add a new user or select an existing one.
Within the selected user, click Change organizational unit and choose the applicable unit.
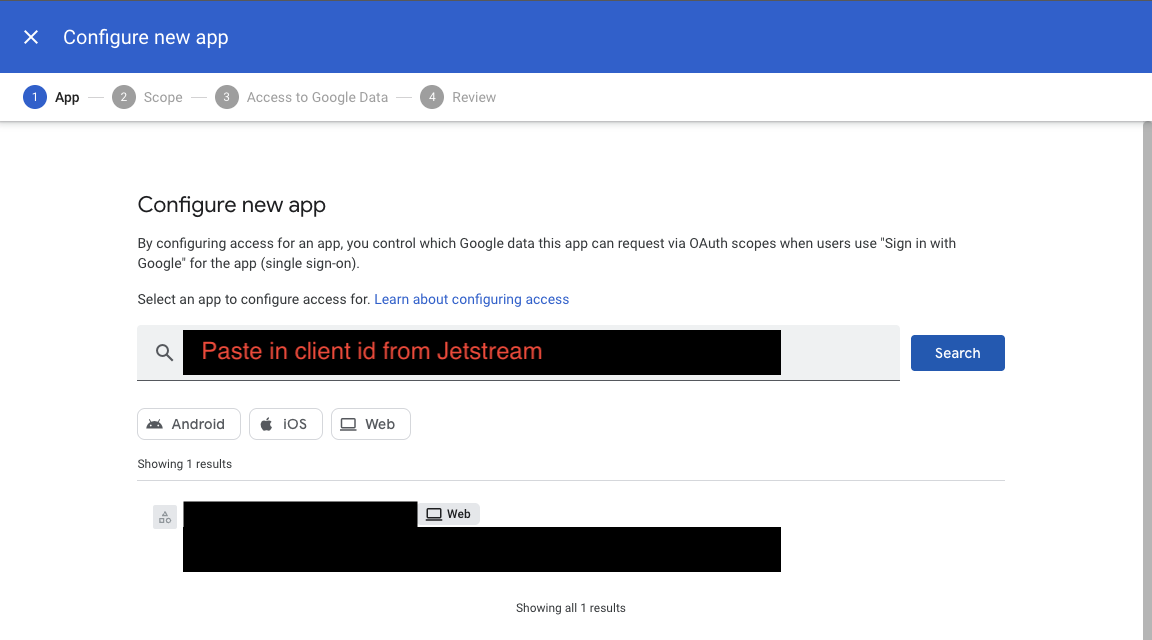
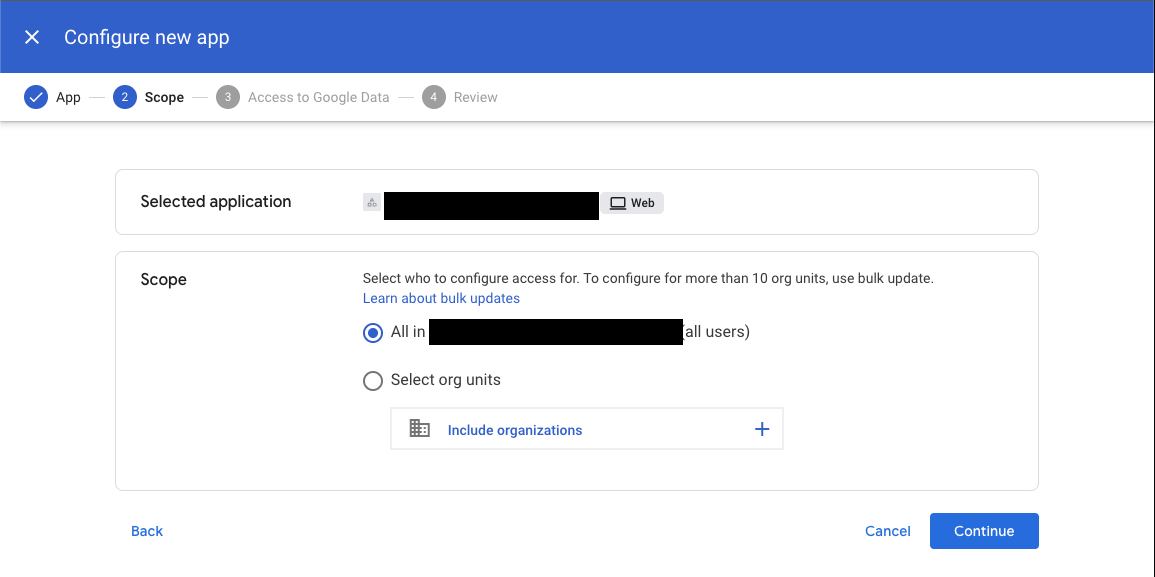
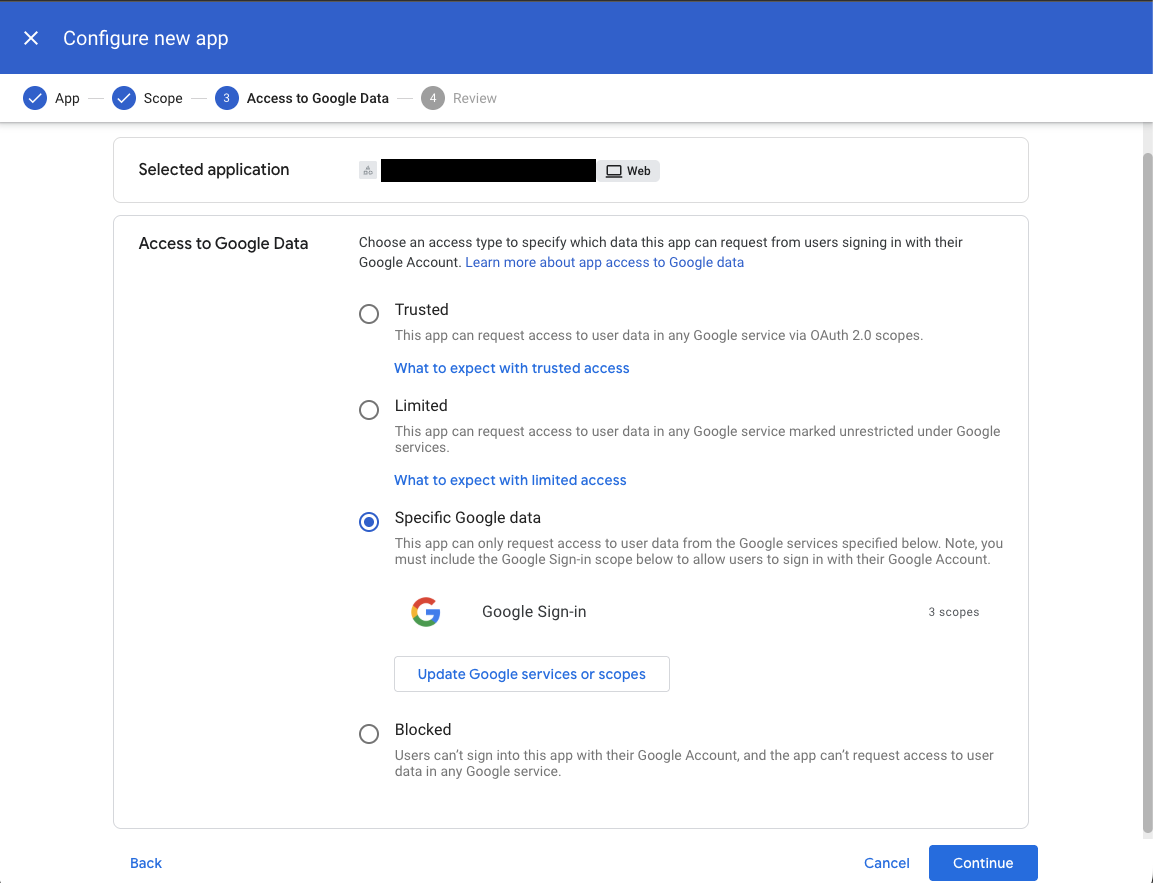
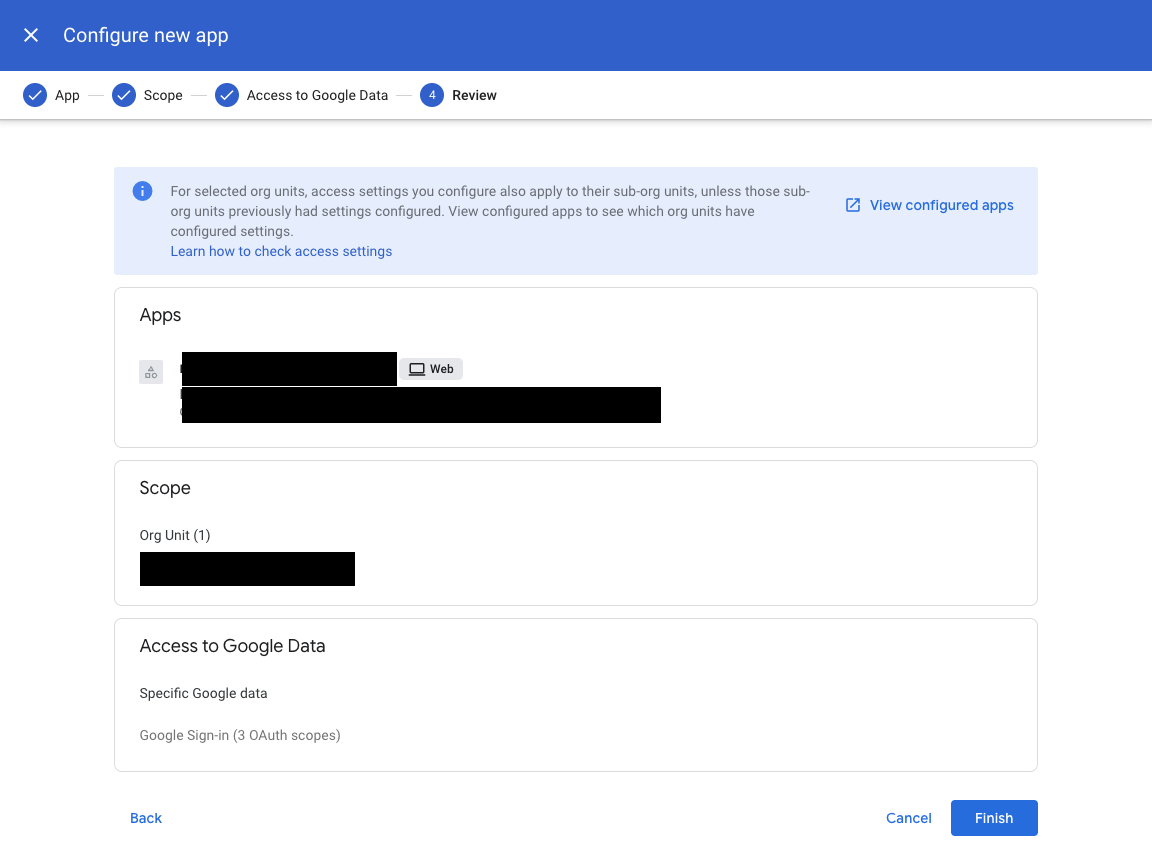
- Go to Security > Access and data control > API Controls
- Click on Manage App Access
- Click on Configure new app
- Paste in your Client ID in the search bar and hit enter
- Click on the Jetstream App that you created from the search results
- Select the specific organization unit or add one.
- Select your access control
- Click Finish to complete the configuration.
Enable the connection
After saving the connection, make sure to check the "Enable SSO" checkbox to enable SSO for your team.
You can optionally allow users with specific roles to bypass SSO, by default this is enabled for administrators.
Enable IdP-Initiated Login (Optional)
Google Workspace does not natively support an "Initiate Login URI" for OIDC apps in the same way as other identity providers. However, you can use the Initiate Login URI from the Jetstream Team Dashboard as a custom link or bookmark for users. It will be in the format:
https://getjetstream.app/api/auth/sso/oidc/{uuid}/initiate
If you prefer users to launch Jetstream directly from the Google Workspace app launcher, consider using SAML SSO instead, which supports IdP-initiated login natively.
Configure Google Workspace for SAML SSO
Add SSO provider in Jetstream
Choose "Add SSO Provider" from your Team Dashboard and select "SAML" as the provider.
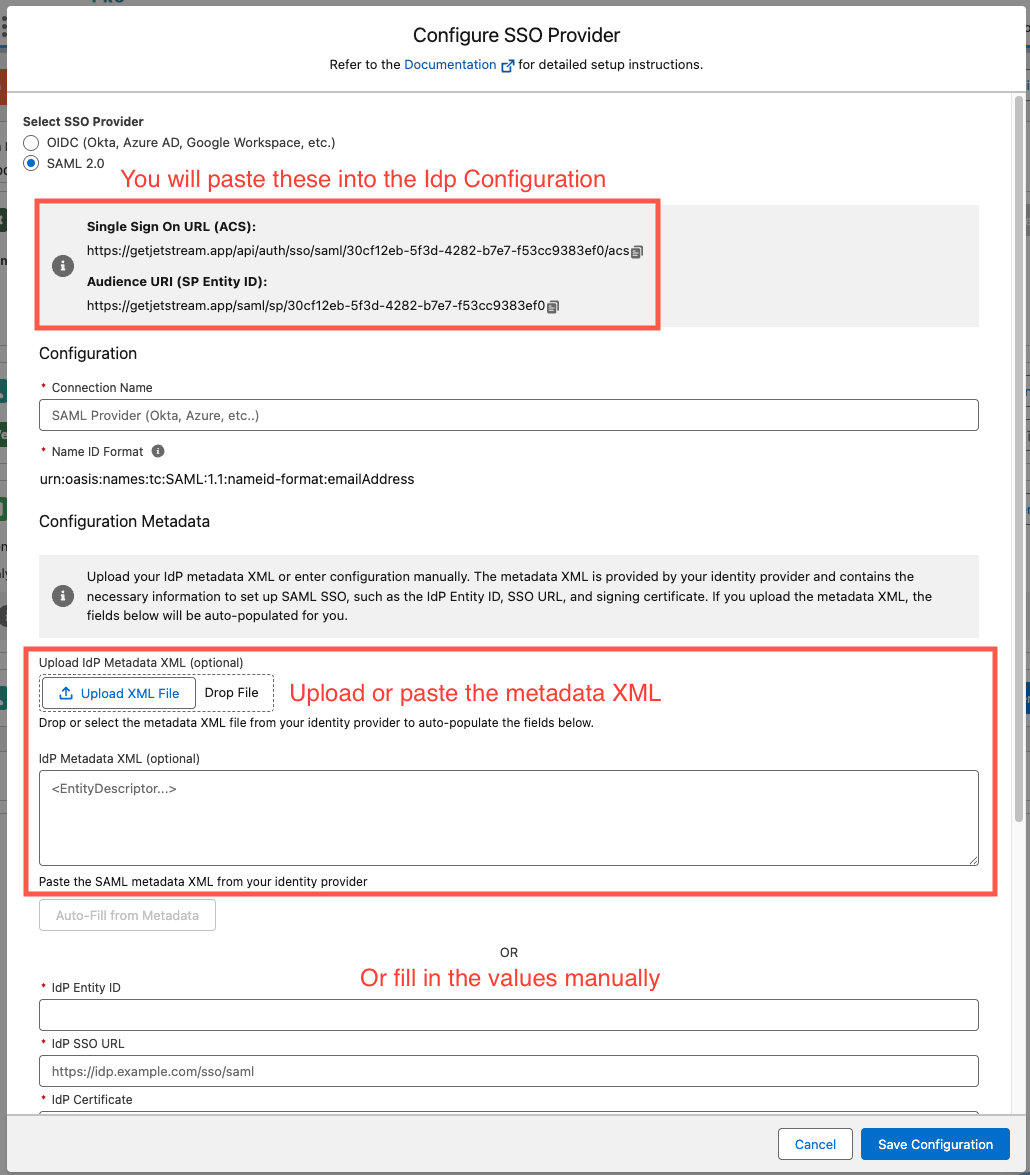
Leave this modal open while you configure the SAML application in Google as you will need to copy values between the two.
Create a new SAML App
Go to the Google Admin Portal
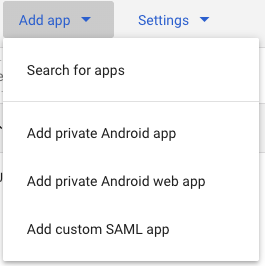
Select Apps > Web and mobile apps.
In the Add App menu, select Add custom SAML app.
Add App Details
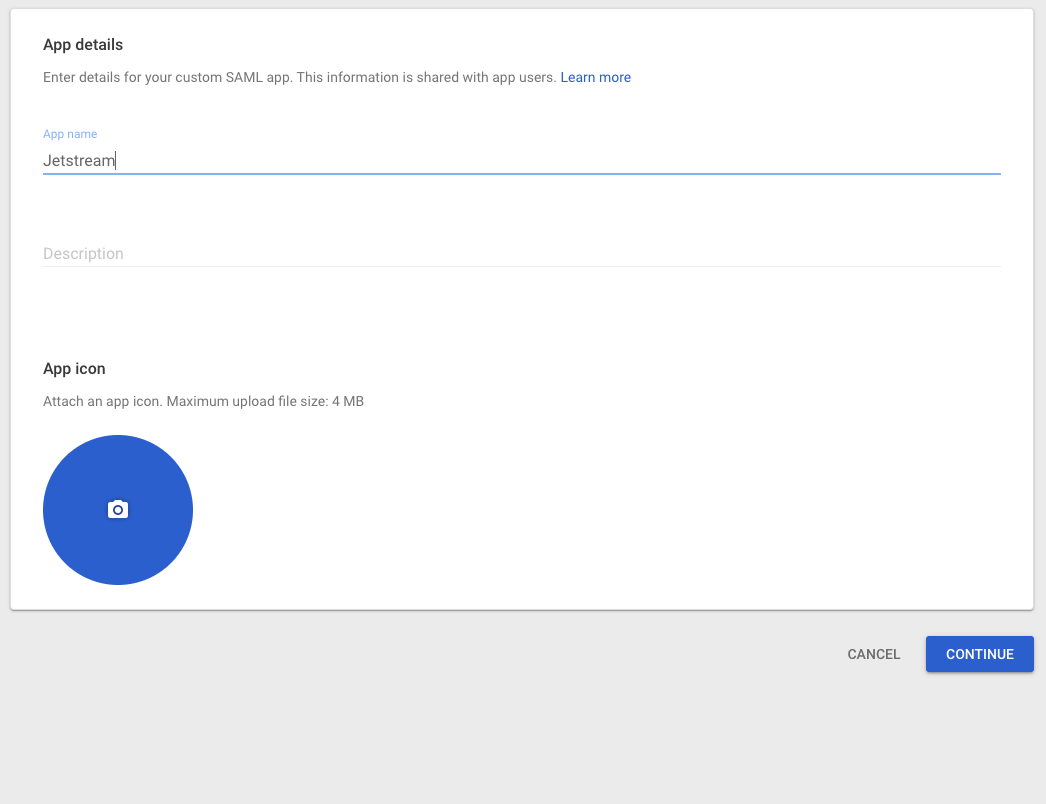
Enter App Name of App (e.g. Jetstream)
set an optional description
upload an optional app icon - here are some options:
- https://getjetstream.app/assets/images/jetstream-icon-pro-128.png
- https://getjetstream.app/assets/images/jetstream-icon.png
- https://getjetstream.app/assets/images/jetstream-icon-white-bg.png
Note: there is a Google bug where the icon preview may look distorted after uploading, but the actual icon should display correctly.
click Continue.
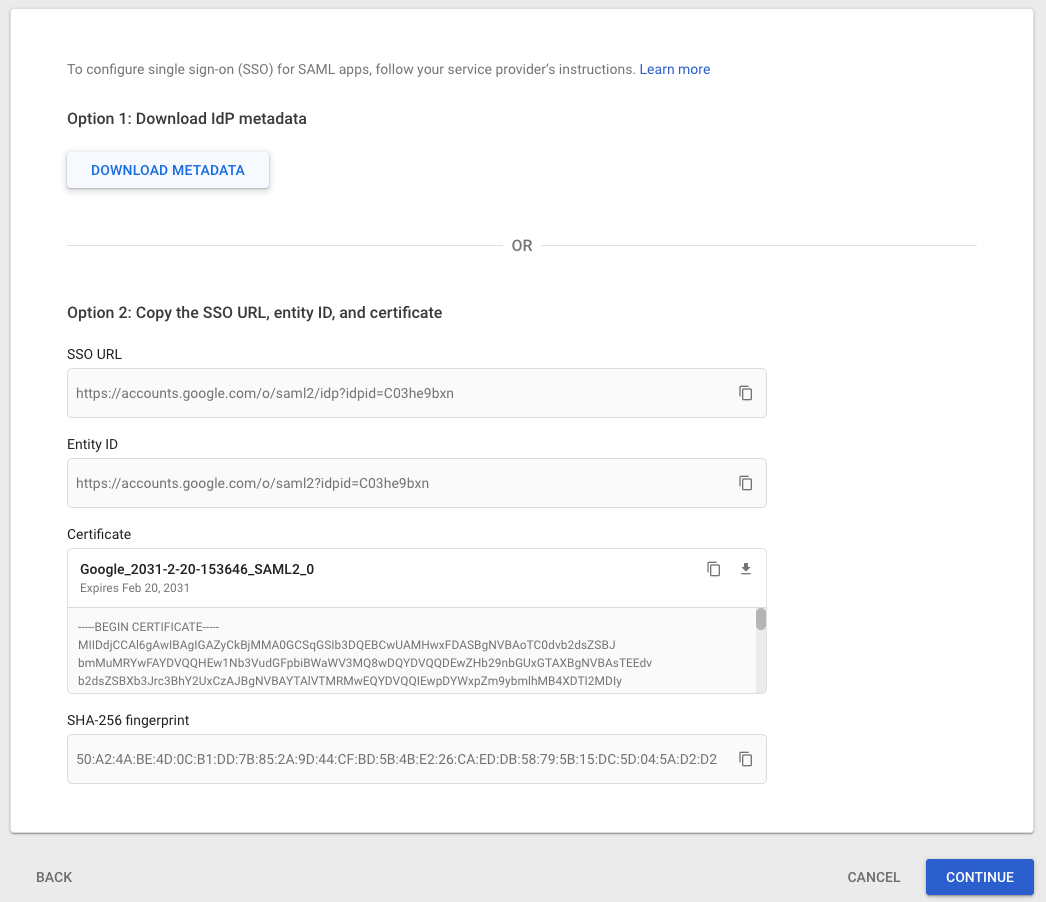
Configure Metadata
Download the IDP metadata XML file and upload to Jetstream in the Upload IdP Metadata XML (optional) field.
The rest of the form should populate automatically after uploading the metadata file. If not, you can manually enter the values.
click Continue.
Make sure that your certificate is not expiring soon, after you save you will have the option to generate a new certificate if needed.
When your certificate is close to expiring, we will send a notification and show a banner when administrators are logged in.
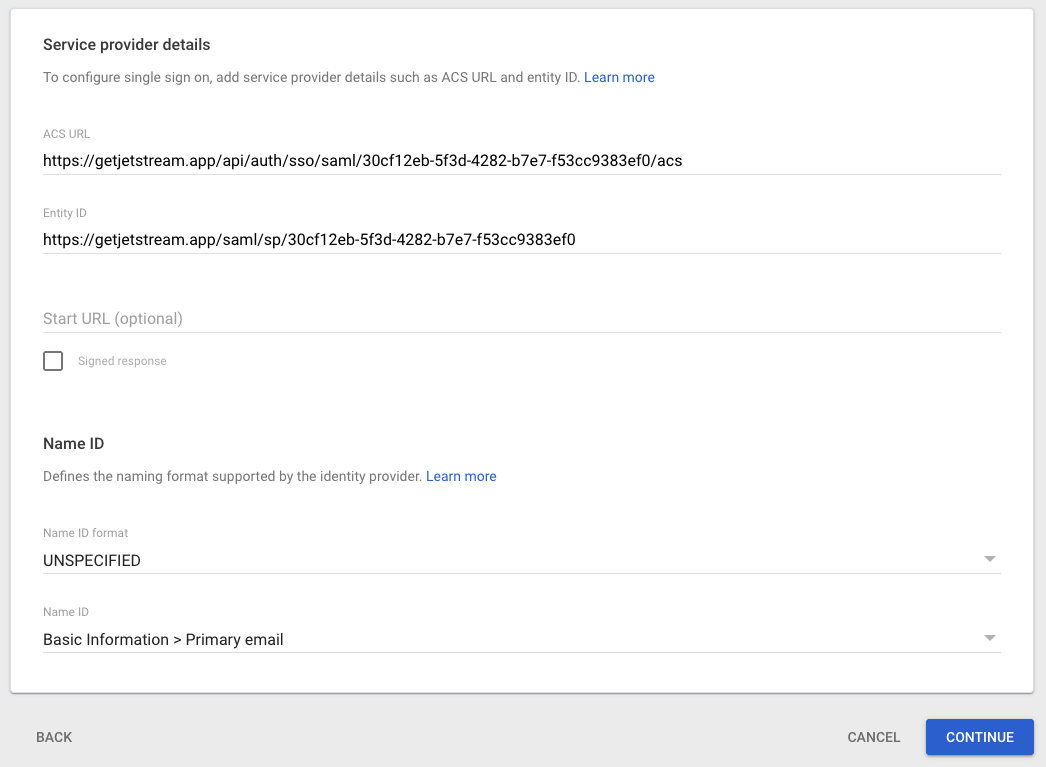
Configure Service Provider Details
Paste in the ACS URL and Entity ID from the SAML configuration modal within Jetstream into the corresponding fields in the Google form.
Leave all other fields as default and click Continue.
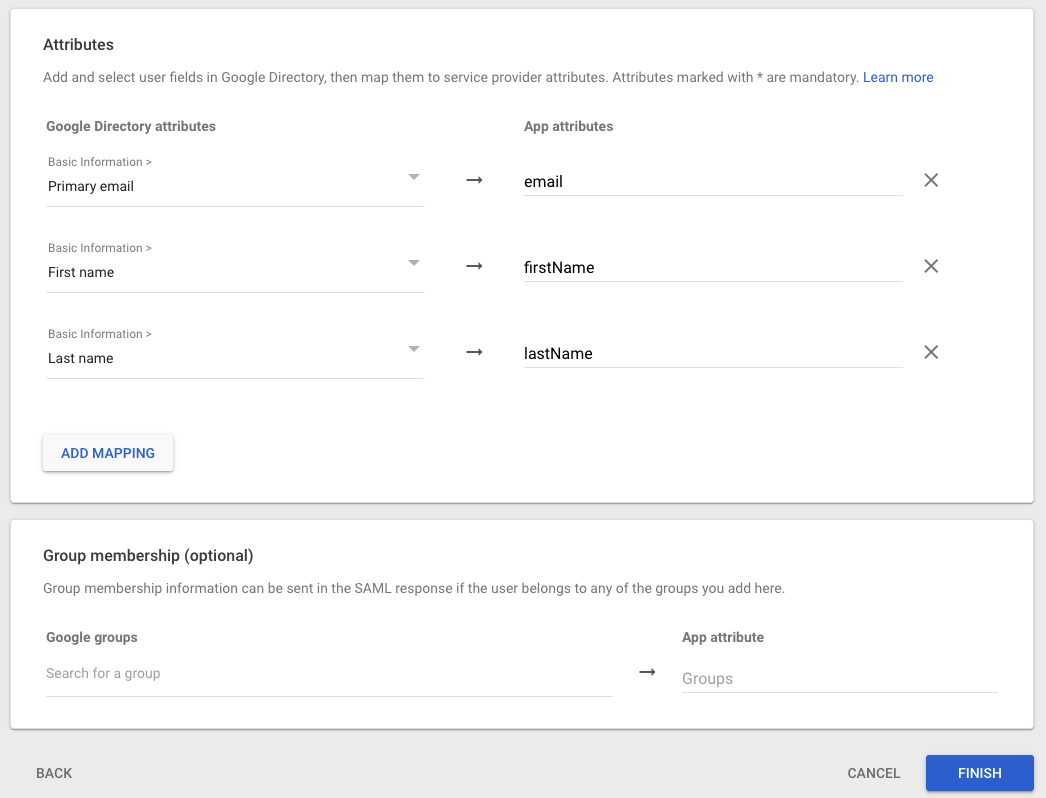
Configure Attribute Mapping
Configure the attribute mapping for the following fields:
- Primary email ->
email - First Name ->
firstName - Last Name ->
lastName
click Finish.
Assign Access
Once the connection is configured, you need to configure which users or groups in your Google workspace should have access to Jetstream.
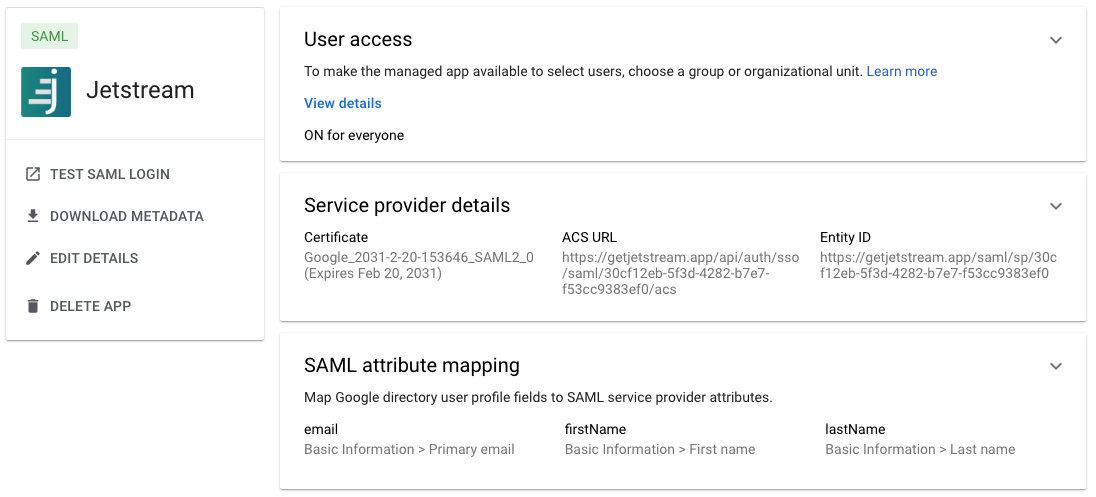
To make the app available to all users, select ON for everyone in the User Access card for the app you just created.
To make the managed app available to select users, choose a group or organizational unit. Refer to Google's documentation for more details - there is a link in your Google dashboard
Enable the connection
After saving the connection, make sure to check the "Enable SSO" checkbox to enable SSO for your team.
You can optionally allow users with specific roles to bypass SSO, by default this is enabled for administrators.